How to Sew A Gown for Beginners

Want to learn how to sew a gown for beginners? Have you been trying to sew a beautiful evening gown? Is it too difficult a job?
Sewing a gown on your own can seem like an incredibly tough job. However, it is not as difficult as you think it is. All you need is some tools, a suitable fabric, a needle and a spool of thread, a sewing machine, and a great idea!
Sewing a gown is actually an excellent beginner project. However, you must remember to choose an uncomplicated style and pick an easy-to-handle fabric.
How to sew a gown for beginners with limited supplies?
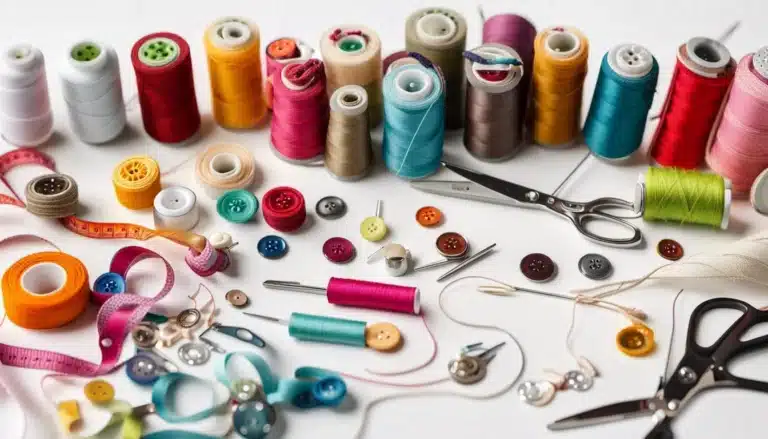
It is highly likely that you are in for a beginner project and you have limited supplies. Don’t worry, you only need very basic tools to sew a gown.
- Paper and Pencil
- Butcher’s paper because this is required to attach a stencil.
- Chalk
- Measuring Tape or ruler
- Scissors
- Fabrics
- Dress Zipper (if necessary)
- Needle and thread (pick the most suitable color)
- Seam Ripper
- Sewing Machine
How to sew a gown for beginners? Method 1
Step 1- Draft the Design
This is the first step and the most challenging step in sewing the gown. Whether it is a pretty little black dress or a long colorful evening gown, you need to first jot it down on paper.
While sketching the type of cloth, you need to keep in mind that the design you are making will be the base of everything you are set to produce.
Measure the model for whom you are sewing the cloth. It does not matter at all if it is a mannequin, your best friend, or yourself. Incorporate your measurements in the design. Also, you can use a graph sheet instead of plain paper for better symmetry and proportion.
Drawing the details down will allow you to decide upon the amount of fabric you will buy. If you are making a dress with long seams or skin-tight, if it is short or long, estimate carefully.
You can get as much creative and funky as you like and personalize the tiniest of the details.
Step 2- Transfer the design to Butcher’s Paper
Butcher’s paper was initially made for butcher’s to wrap meat and fish and later used for art as well. Butcher’s paper is excellent since it is hard to bend and tear. Some tips to follow while transferring the design to butcher’s paper are as follows:
- Constantly double-check the measurements with a tape
- Work on a hard surface
- Use pencil and erasers as well
- Use stencils
Step 3- Tracing
Iron the fabric before you start this. Lay the stencils out on the material after it is cut and trace it on your fabric with a chalk wheel. Make sure the stencil does not move about while you trace the fabric.
Most probably, you will need to cut out two pieces of clothes. One in the fabric you want the dress in, and the other is for a liner piece of cloth.
Table of Contents
Step 4- Sew the Clothes
Start sewing the liner piece of clothes and the main fabric together. Alignment is the key to this process. Hence make sure to pin around the edges before starting to sew.
Make sure to keep your liner cloth on top and your chosen fabric at the bottom. You will have to turn the cloth inside out, also remember not to sew the bottom edge.
Step 5- Ironing the Cloth
You can iron the cloth even before sewing as well. In fact, depending on the cloth, sometimes it is essential. Also, once you flip the dress piece inside out, they need to be ironed as well.
Coax out extra materials and make sure to iron the edges perfectly. Since you are a beginner and the fabric you are handling can be relatively new to you. Hence, test iron on a waste piece of your cloth.
This will prevent you from accidentally burning the fabric after all the hard work you would have put in so far.
Step 6- Sew all the Planes together.
This process is complicated only if you do not have a plan. Firstly, you need to pin planes together before you start sewing them all together.
Some tips to make a plan that will make this process easier are as follow
- Have a clear picture of where to start, go through and end.
- You can decide on whether to start sewing the planes from top to bottom or from bottom to top.
- You can use numbers or alphabets to make sure you do not miss a plane or sew it in the wrong order.
Step 7- Ornamentation
The final part is to add additional things. You can sew some lace lining, zippers, corsage, flounces, braids, cords, and beadings, or anything you like.
How to sew a gown for beginners? Method 2
If you find the first method too challenging or too boring, there is always another way.
Supplies Required for Method 2
This method requires fewer supplies. Also, most of them, except the sewing machine, can be probably found in your drawers.
- The fabric you have chosen for the gown
- Needle and thread (suitable color)
- Sewing Machine
- Tailor’s chalk or an erasable fabric marker
- Basic Sewing Kit including scissors, pins, and others
Step 1- Folding the Fabric
This is the first also the easiest step. You need to fold the fabric you are working on in half and again in half lengthways. Now, there will be four layers of fabric.
Lay a folded T-shirt for measurement on the fabric against the edge within the two folds of fabric. Gently apply force on the fabric to make sure they are laid out without any shrink or crease.
Step 2- Marking on the Fabric
Mark around the t-shirt on your fabric with chalk or fabric marker. Make sure you are conscious of size as well as design when you mark. For example, if you need a V-neck dress and the t-shirt you are using is a round-necked t-shirt, mark a V neck.
It will be better if you do not strictly follow the shape of the t-shirt. Remember that you are not making another t-shirt, and you are only using it for measurement.
Curve using the chalk at the hem of the fabric gradually. Do not make the curve too shallow or too steep. This will make the sewing process difficult.
Step 3- Correction of markings
Correct the length, shape, and every other factor you think is not up to the mark. Check for the neck opening as well. The fabric is ready to be cut out when you are satisfied with everything.
This is the part where you can add if you have made any changes. However, the correction will give you space to make only minor changes to the design.
Step 4- Cutting the Fabric
You will be left with two pieces that are similar for both the front and back of the dress. You can cut out the piece that you are supposed to sew.
Lay out both the pieces in a way that the center fronts of both pieces align with the one on top folded in half.
Step 5- Alignment
Pick the front piece and cut the neckline a little lower. Make sure to cut only two to three inches curve lower than the back piece. If you need a deeper neck, you can adjust it later.
Align the neckpieces of the front piece and the back piece. If necessary, cut them to be perfectly in line.
Step 6- Assembly of Planes
Keep both the pieces of fabric together facing the right side and sew the sides down in one pass. Start this process from the hem of the sleeve to the bottom.
Sew the shoulder seams together as well and finish the raw edges with an overlocker or a zigzag pattern.
Step 7- Finishing the Process
Pin the bottom hem of the fabric in place after you fold the bottom hem. You can use a twin needle to give a professional finish. Also, you can use a stretch stitch on the sewing machine.
Some machines have a specialized stitch or an option for narrow zigzag stitching. Follow the curve of the dress from top to bottom, and do not forget to topstitch at the hem.
Sew all the raw edges, including the sleeves, neatly. This also includes the neck. You can decide upon the type of neck you want and the type of bottom you want and sew accordingly.
It will be the time to decorate your gown and put on your new handmade gown.
Sew A Gown for Beginners- Pros and Cons
Sewing your own gown comes with its own pros and cons. Especially for a beginner, it can be difficult to weigh in the good and the bad that come with sewing your own gown. Please read on to understand better.
More on How to Sew A Gown for Beginners
It is crucial to know the basics of sewing. Also, it is essential to be prepared to complete all the processes and techniques correctly. This will ensure the best outcome.
The second method is much simpler. However, the precision offered by the former method is better. Yet, the second method is relatively faster than the first one.
Depending on the fabric, you may need to add an extra step or two. Besides, there are things you can create on your own methods and techniques.
Additionally, it is essential to rely on reliable sources to find the most suitable information. The information can be regarding the type of fabric, the appropriate machine operation, or the way of stitching.
You can always ask your neighbors or friends who have sewn a gown before. Alternatively, you can consult an online forum for more ideas and assistance.
Final Verdict
To sew a gown as a beginner requires multi-stages of preparation. It starts from picking the suitable fabric, making the precise cut, and it goes all the way to the time it takes.
Hopefully, this article on how to sew a gown for beginners helped. Also, you will learn a lot during the processes about clothes as well as your creative self.
Remember to be patient, and ensure that you don’t get discouraged by the cons. Wearing a handmade gown made just by you is something to be proud of. You can wear it yourself or gift a friend and the uniqueness will not go unappreciated.
