Needle Threader: Streamline Sewing with this Handy Tool
A needle threader is a small, simple device that you might easily overlook, but it’s a game changer for anyone who sews, whether you’re a beginner or seasoned.
When you’re squinting to get the thread through that tiny eye of the needle, a needle threader can save the day.
It’s especially helpful if you’re working with multiple threads or needles, keeping your sewing projects moving smoothly without the constant hassle of poking and prodding at the needle’s eye.
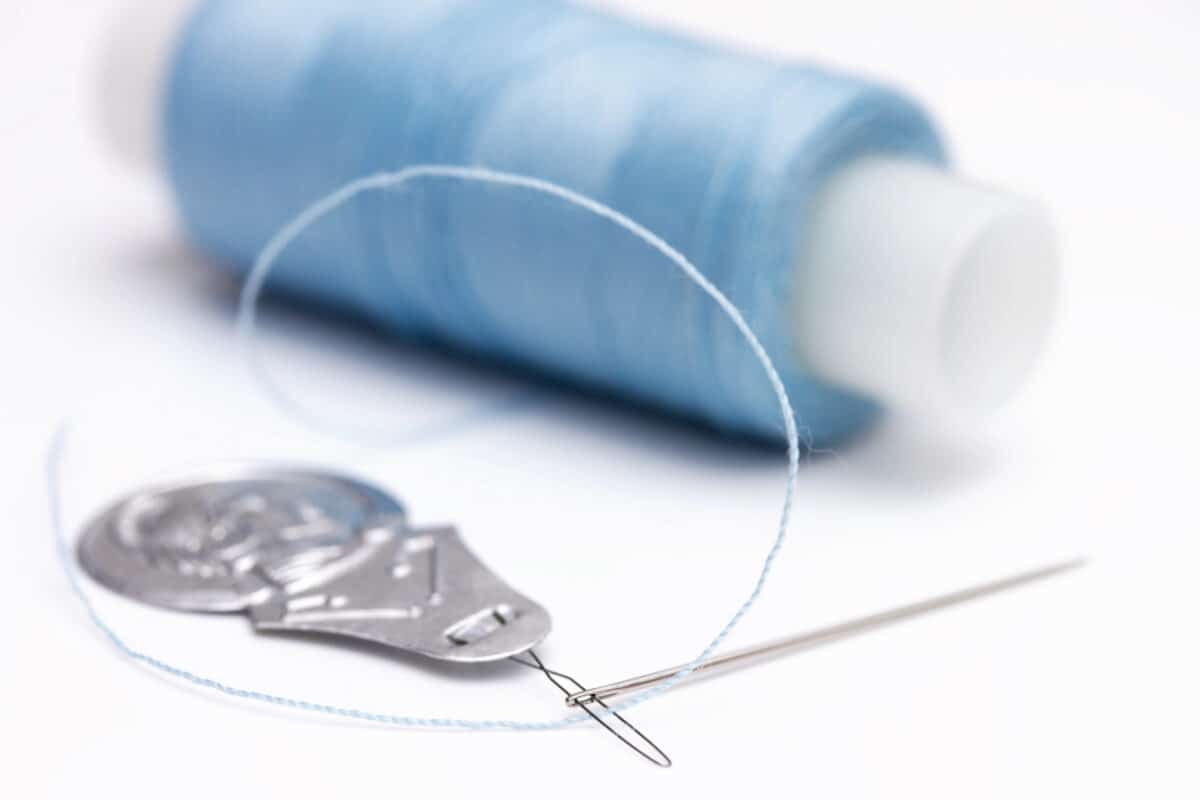
The concept behind needle threaders is straightforward: they temporarily provide a larger and more visible target to which you can attach your thread before pulling it through the eye of the needle.
This is not only a godsend for those with less than perfect eyesight or unsteady hands, but it’s also an efficient tool for speeding up the setup process of both hand sewing and machine sewing.
The classic wire-and-coin-style threader has been around for ages, and now there are numerous variations, including those built-in to sewing machines to assist with threading the needle automatically.
Table of Contents
- 1 Understanding Needle Threaders
- 2 Using a Needle Threader
- 3 Sewing Aids and Accessories
- 4 Frequently Asked Questions
- 4.1 How do I properly utilize a needle threader for hand stitching?
- 4.2 What is the most reliable needle threader currently on the market?
- 4.3 Can you recommend a needle threader suitable for use with sewing machines?
- 4.4 Are there any innovative automatic needle threaders available?
- 4.5 What alternatives exist if I don’t have a needle threader on hand?
- 4.6 How is an embroidery needle threader different from regular needle threaders?
Key Takeaways
- A needle threader is an invaluable tool that significantly eases the threading process in sewing.
- They are beneficial for both hand and machine sewing, improving efficiency and accessibility.
- Threaders come in various styles, including traditional and those integrated into sewing machines.
Understanding Needle Threaders
Entering the world of sewing accessories, you’ll find the nifty needle threader, an essential tool for anyone who sews.
Whether you’re battling with a frayed thread or straining to see the eye of a needle, a threader can save your day.
Types of Needle Threaders
- Wire Loop Needle Threaders: This classic design has a simple, flat handle with a wire loop. Pop your thread through the loop, push it through the needle eye, and you’re set to sew.
- Automatic Needle Threaders: These modern marvels are built into some sewing machines. Just a lever press, and it threads your needle, hassle-free.
- Plastic Needle Threaders: Often shaped fun and friendly for kids but sturdy for all, these are your budget-friendly choice.
- Specialty Threaders: Take, for instance, the Dritz LED Needle Threader. It not only helps you thread but also illuminates your work area. Then there’s the Jofefe Stainless Steel Needle Threader, robust and reliable for those of you who mean serious sewing business.
Tip: Automatic needle threaders can be a godsend for heavy sewing sessions.
Selecting the Right Needle Threader
When picking a needle threader, consider these points:
- Compatibility: Verify that the threader fits with your needle size.
- Durability: Metal threaders tend to outlast plastic ones, but a well-made plastic threader can still be a great, economical choice.
- Functionality: Automatic threaders are slick on sewing machines, but for hand needles, a wire loop type does the trick.
A handy chart for quick reference:
| Needle Threader Type | Best For | Durability |
|---|---|---|
| Wire Loop | Easy fixes, travel kits | Low |
| Automatic (Sewing Machine) | Frequent, high-volume sewing | High |
| Plastic | Limited use, kids and beginners | Moderate |
| Specialty (e.g., LED) | Targeted functionalities, poor lighting conditions | High |
Components of a Needle Threader
You ought to be familiar with the anatomy of your tool:
- Handle: Provides the grip. Varies from plain to ergonomic designs.
- Wire Loop or Hook: The real star of the show. It’s what passes through the needle eye, carrying with its thread.
- Additional Features: Some might come with cutters or lights, like the LED feature in the Dritz LED threader, which can be a bright idea for dimly-lit spaces.
Using a Needle Threader
When it comes to threading needles, the difference between a minor nuisance and smooth sailing can often hinge on a simple, yet ingenious tool—a needle threader.
This nifty device will not only save your eyes but also a chunk of time, especially if you’re juggling a sewing project that has a lot of starts and stops.
Step-by-Step Instructions
1. Prepare the thread and needle:
- Take a single strand of thread, measuring about 18 inches to prevent tangling, and a sewing needle with an eye big enough to accommodate the thread.
- Cut the thread sharply at an angle to create a clean, pointed end.
2. Hold the needle threader:
- With your dominant hand, grip the handle of the needle threader. This increases coordination and control.
3. Insert the wire loop:
- Gently push the wire loop through the eye of the needle until it emerges on the other side.
4. Hook the thread:
- Take the tail of the thread and pass it through the wire loop of the threader. It helps to keep the loop and the tail of the thread taut.
5. Pull the thread through the needle’s eye:
- While securing the needle and threader with one hand, use your other hand to pull the needle threader back through the eye. This will drag the thread along with it.
- Once the thread is through, remove the threader and pull the tail of the thread to the desired length.
6. Knot the end (if needed):
- If your sewing task requires, make a small knot at the end of the thread; a double thread can add strength for buttons or tougher fabrics.
Tips for Threading a Needle
Choose the right thread and needle combo:
- Always opt for a needle whose eye is the right size for your thread to avoid fraying or breaking.
Mind the loop’s fragility:
- The wire loop is delicate, so insert and pull it through gently to avoid bending or snapping.
Work with sufficient light:
- Good lighting is essential; it can reduce strain on your eyes even with this aid and makes it easier to nail the target on the first try.
Maintain your tools:
- Keep your needle threader flat when not in use to preserve its shape and functionality. Remember, a well-maintained threader can be a steadfast ally in your sewing kit.
Sewing Aids and Accessories
When you’re ready to elevate your sewing game, you’ll find that the right accessories can make all the difference.
Your standard needle and thread are just the beginning — let’s dive into the essentials that will streamline your sewing projects and keep your tools in tip-top shape.
Related Sewing Tools
Crafting a stunning tapestry or nailing that cross-stitch requires precision and patience — and, frankly, your bare hands just won’t cut it.
Scissors and thread cutters are the unsung heroes here; they snip and trim with ease, ensuring your yarns and threads are the perfect length every time.
While we’re at it, let’s talk crochet needles — they come in various sizes and materials, and the right choice can mean the difference between a project that’s a delight and one that’s just… alright.
- Embroidery floss: This is your go-to for all things embroidery and cross stitch, with its rainbow of available colors.
- Sewing thread: Select a high-quality thread; this will lessen the likelihood of snapping and frustration.
And do yourself a favor — pick up a thread cutter disguised as a pendant. Not only does it double as a chic lanyard, but it also keeps sharp edges safely tucked away, because digging for snips at the bottom of a bag is nobody’s idea of a good time.
Maintaining Sewing Accessories
Now, your tools are only as good as their condition. You wouldn’t use a dull knife to slice a tomato, would you? Same goes for your sewing accessories.
Keep your scissors sharp; a dull pair could snag that delicate embroidery floss and ruin a day’s work.
- Clover is not just a plant, it’s a trusted brand in sewing aids — their threaders and cutters are worth the investment.
- Aim to store your sharp tools — scissors, needles, and cutters — separately to avoid damage.
Frequently Asked Questions
Navigating the intricate journey of needle threading can be simplified with the correct tool at your fingertips. Let’s untangle some common queries you might have.
How do I properly utilize a needle threader for hand stitching?
To use a needle threader for hand stitching, insert the wire loop of the needle threader through the eye of the needle, hook the thread through the loop, then pull the loop back out, bringing the thread with it. It’s a simple motion that will save you from squinting and frustration.
What is the most reliable needle threader currently on the market?
The Clover Needle Threader is known for its durability and ease of use. Its fine wire and comfortable grip handle make it a favorite among hand stitchers.
Can you recommend a needle threader suitable for use with sewing machines?
The Dritz Machine Needle Inserter and Threader is specifically designed for sewing machines. It holds the needle steady for easy insertion and threading.
Are there any innovative automatic needle threaders available?
Yes, the Brother Sewing Machine range often comes with built-in automatic needle threaders. This sophisticated feature threads the needle for you with the press of a lever.
What alternatives exist if I don’t have a needle threader on hand?
If you find yourself without a needle threader, try flattening the end of the thread with a pair of scissors. Then, wet it to make it stiff and thread the needle by hand with patience and a steady hand.
How is an embroidery needle threader different from regular needle threaders?
Embroidery needle threaders have a larger loop and a more durable mechanism. They’re designed to handle the thicker embroidery floss versus standard sewing thread.
They’re a must for any embroidery aficionado.
