How to Thread a Cross Stitch Needle: A Foolproof Method for Beginners
Threading a needle for cross stitch may seem like a mundane task, yet it’s a crucial step that sets the stage for your embroidery endeavors.
Whether you’re tackling a project on a tightly woven aida or the more delicate weave of linen, starting off with a properly threaded needle can make your stitching experience significantly more enjoyable.
Ensuring the thread passes effortlessly through your fabric without fraying or tangling is key to crisp, clean stitches.
Before diving into your next picturesque scene or heartfelt quote captured in cross stitch, you need to get the basics down pat.
Gathering your materials is the precursor to the creation process.
With the right thread, needle, and attitude, crossing that first stitch over your chosen fabric will feel less like a task and more like the beginning of a rewarding journey.
With each puncture of the fabric and careful placement of the thread, you’re on your way to mastering this timeless craft.
Table of Contents
- 1 Preparing Your Cross Stitch Materials
- 2 Threading the Needle Made Simple
- 3 Starting Your Stitching Journey
- 4 Tips for Happy Stitching
- 5 Frequently Asked Questions
- 5.1 What are the best techniques for threading a needle when starting cross stitch?
- 5.2 Can you explain the method to thread a needle with multiple strands for embroidery?
- 5.3 How can you thread a cross stitch needle if you don’t have a threader?
- 5.4 Is it necessary to double the thread for cross-stitch projects, and if so, how?
- 5.5 What’s the simplest way for a beginner to thread a cross stitch needle?
- 5.6 What are the steps for threading a needle with three strands for cross-stitch?
Key Takeaways
- Threading your needle correctly is fundamental to successful cross stitching.
- Proper preparation of materials enhances the overall stitching experience.
- Mastering threading techniques is key to starting and enjoying your project.
Preparing Your Cross Stitch Materials
Before you dive into the creative world of cross stitching, it’s crucial to get your ducks in a row with the right materials.
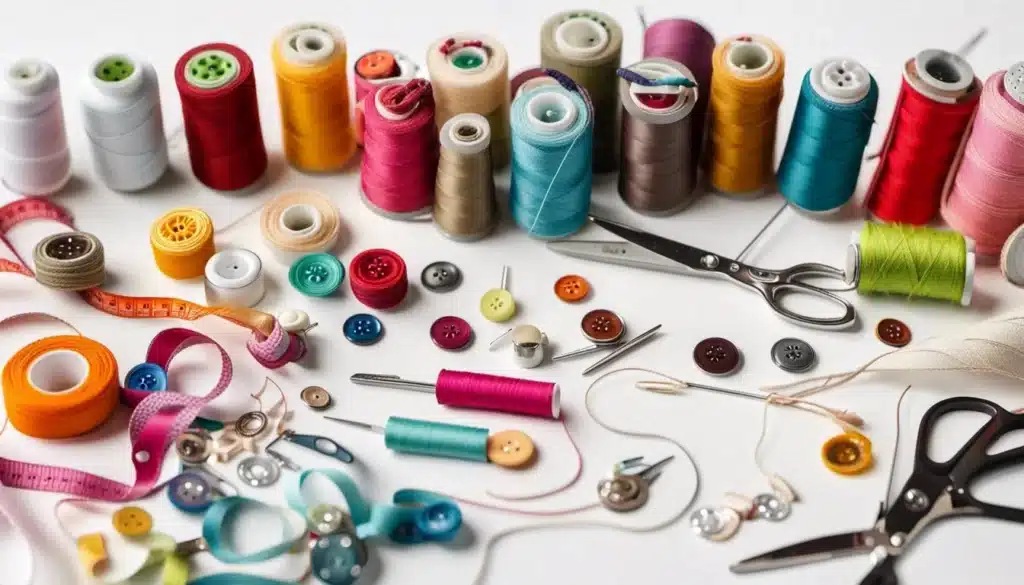
I’ll walk you through selecting that perfect needle, understanding your fabric choices, and picking the thread that will bring your project to life.
Selecting the Right Needle
Cross stitch needles, or tapestry needles, are a non-negotiable for your project.
To avoid fraying or damaging your fabric, these needles come with a blunt end and a large eye, which is great for threading those thicker strands of embroidery floss.
Here’s a quick cheat sheet for needle sizes:
| Needle Size | Fabric Count | Ideal For |
|---|---|---|
| 24 | 11-14 | General use |
| 26 | 14-18 | General use, finer fabric |
| 28 | 18+ | Fine details and high count |
Understanding Fabric Types
Your fabric choice can make or break the crispness of your cross stitch.
Aida fabric is the go-to for beginners – with its open weave, it makes counting those X’s a breeze.
But remember, the higher the fabric count, the smaller the stitches; a standard choice is a 14-count Aida.
If you’re feeling adventurous, there are fabrics like linen with a more natural and irregular weave – excellent for a rustic touch.
Choosing Your Thread
When it comes to threads, you want something that glides through fabric with the right tension.
DMC embroidery floss is your best bet; it’s the gold standard for its range of colors and quality.
Embroidery floss is usually six-stranded, but you can adjust the thickness by using fewer strands.
Let’s not forget about pearl cotton – this non-divisible thread adds a lovely sheen and texture to your work.
Just be sure to match your thread type to your needle size for a frustration-free experience.
Threading the Needle Made Simple
Setting up your cross-stitch needle doesn’t have to be a knot-worthy experience. With the right technique, you’ll have your thread secured in no time, ready for a smooth start to your project.
Using a Needle Threader
If you find threading needles a bit fiddly, a needle threader is your best friend.
It’s a simple tool but a game-changer.
Firmly grasp your cross-stitch needle between your thumb and index finger leaving the eye exposed.
Then, push the wire of the needle threader through the eye.
Pass your thread through the large wire loop of the threader, pull the threader back through the needle’s eye, and voilà, your needle is threaded.
The Loop Start Method
For a tidy finish from the get-go, try the loop start method, ideal for threads divisible into even numbers.
Cut a single length of thread twice as long as you usually would. Fold it in half and thread the cut ends through the needle eye, leaving a loop at the other end.
Pass the needle through your fabric to begin the first stitch, and before pulling the thread entirely through, guide the needle through the loop end.
This technique secures the thread without knots, relying on friction to keep it tight.
The Traditional Approach
Some purists swear by the classic threading method.
Cut a length of thread — not too long, you don’t want it to tangle — and dampen the end with your lips to reduce fraying.
Pinch the end between your thumb and finger and ever so carefully push the thread through the needle’s eye.
A little patience goes a long way here.
Pull the thread through until you have a tail long enough to ensure it won’t slip out.
Starting Your Stitching Journey
Embarking on a new cross stitch project is thrilling, but ensuring a solid foundation in technique and approach is key.
You’ll want to become familiar with creating X-shaped stitches, securing your thread with confidence, and managing your pattern like a pro.
Beginning with X-shaped Stitches
Your journey starts by learning the quintessential X-shaped stitch.
To practice, you’ll need an even-weave fabric like Aida, which has a grid perfect for beginners.
Your first stitch is a simple diagonal line from the bottom left to the top right of an Aida block, followed by the opposite diagonal to form your ‘X’. Here’s how:
- After threading your tapestry needle with about an 18-inch length of floss, bring the needle up through the bottom left corner of an Aida square.
- Insert the needle down at the top right corner to complete the first half.
- Come up again at the bottom right and finish by going down at the top left to complete the ‘X’.
Securing the Thread
Securing the thread without a knot is essential, as knots can create lumps and affect the flatness of your finished piece.
There’s a nifty way to start that involves catching the tail of your thread under the stitches. Here’s the strategy:
- Start by leaving a small tail of thread (about an inch) on the backside of the fabric.
- As you make your first few stitches, weave the needle over and under the tail to secure it in place.
Tips for Happy Stitching
When you’re gearing up for a cross-stitch project, think of your embroidery needle as your trusty sidekick.
Choose the right needle—not too large or small for the fabric and floss you’re working with. This will save you a ton of frustration.
Remember, your needle is precious. Keep it safe in a needle case when not in use to avoid those pesky moments of it disappearing into the abyss of your couch. Trust me, those needle cases are lifesavers.
Ever heard of needle minders?
These little magnetic charmers can attach to your fabric and hold onto your needle whenever you need a break.
They’re not just practical; they’re often cute enough to make you smile every time you use them.
Here’s a quick guide:
- Thread: Cut a length of floss about 18 inches long.
- Needle Threading: Flatten the end of the thread between your fingers—this makes it easier to thread.
| Steps | Insight |
|---|---|
| 1. Thread the needle | Don’t lick the thread! It can fray and make threading tougher. |
| 2. Start stitching | No knots needed. Start with the sandwich method instead. |
| 3. Finish off | Weave the ends under your stitches. |
Above all, enjoy the process. Your cross-stitch project is your zen garden. Approach it with a sense of peace and you’ll find happy stitching is more than just a catchy phrase—it’s your reality.
Frequently Asked Questions
Embarking on a cross-stitch journey can be exciting, yet threading a needle often trips up many. It’s all about the right twist and pull to get you started.
What are the best techniques for threading a needle when starting cross stitch?
You’ll want to cut a clean edge on your floss and pinch it tightly between your fingers. Slowly guide the floss to the needle’s eye. This firm grip and precise navigation should let it slide through without a hitch.
Can you explain the method to thread a needle with multiple strands for embroidery?
Absolutely. First, determine how many strands your pattern calls for, then separate them out. Take the needed strands, align them, and then thread them through the needle’s eye together. This keeps your embroidery neat without any strand wandering amok.
How can you thread a cross stitch needle if you don’t have a threader?
Fear not! An old school trick is to fold the floss over the needle itself and then pinch the fold tightly, slipping the needle out before slipping the floss through the eye. It’s a bit finicky, but it works wonders once you get the hang of it.
Is it necessary to double the thread for cross-stitch projects, and if so, how?
For coverage with oomph on your fabric, doubling the thread is often the way to go. Simply cut a length of thread, fold it in half, and thread the folded end through your needle. Then pass the needle through the loop of the thread at the end, securing it in place.
What’s the simplest way for a beginner to thread a cross stitch needle?
For an easy start, use a needle threader—it’s like training wheels for threading. Or, try waxing the end of your thread for stiffness and simply push it through the eye. It’s straightforward and you’ll feel like a threading pro in no time.
What are the steps for threading a needle with three strands for cross-stitch?
Start by cutting a length of six-stranded floss. Pull out three strands one by one to avoid tangling.
Then line up the ends, gently twist them if necessary, and thread them through the needle’s eye. Voila, you’re on track for a three-stranded masterpiece.
